Google Analytics
Integration with Product Fruits
To enable the integration, first select the Integrations menu option as seen in the image below.
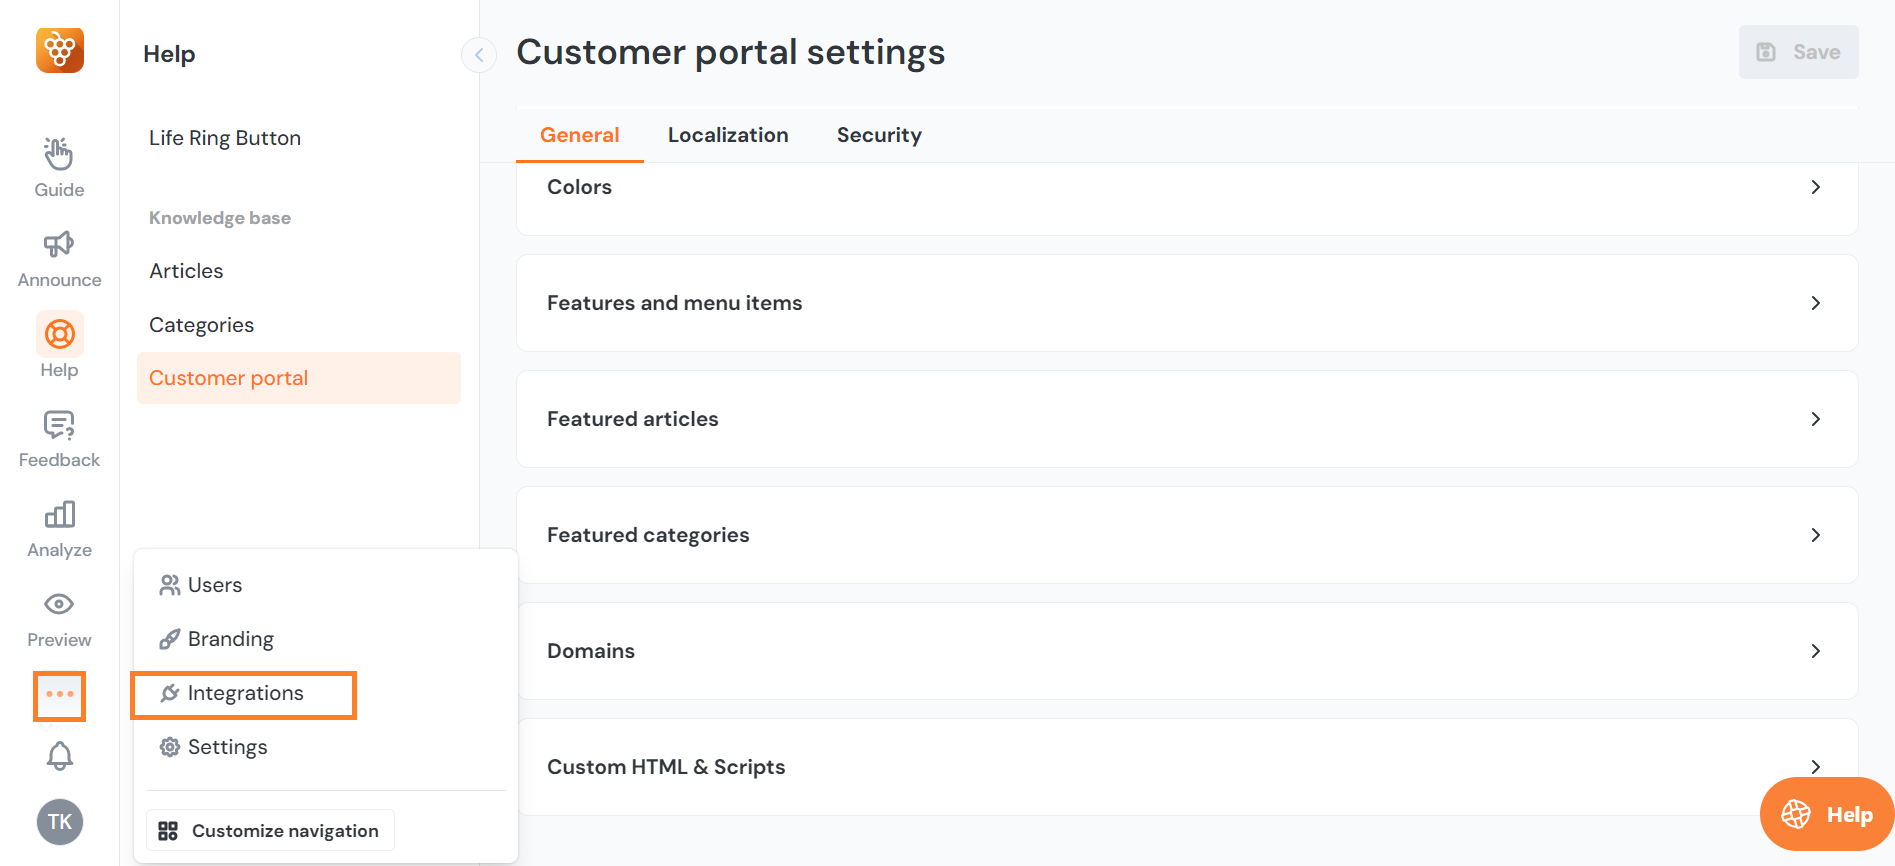
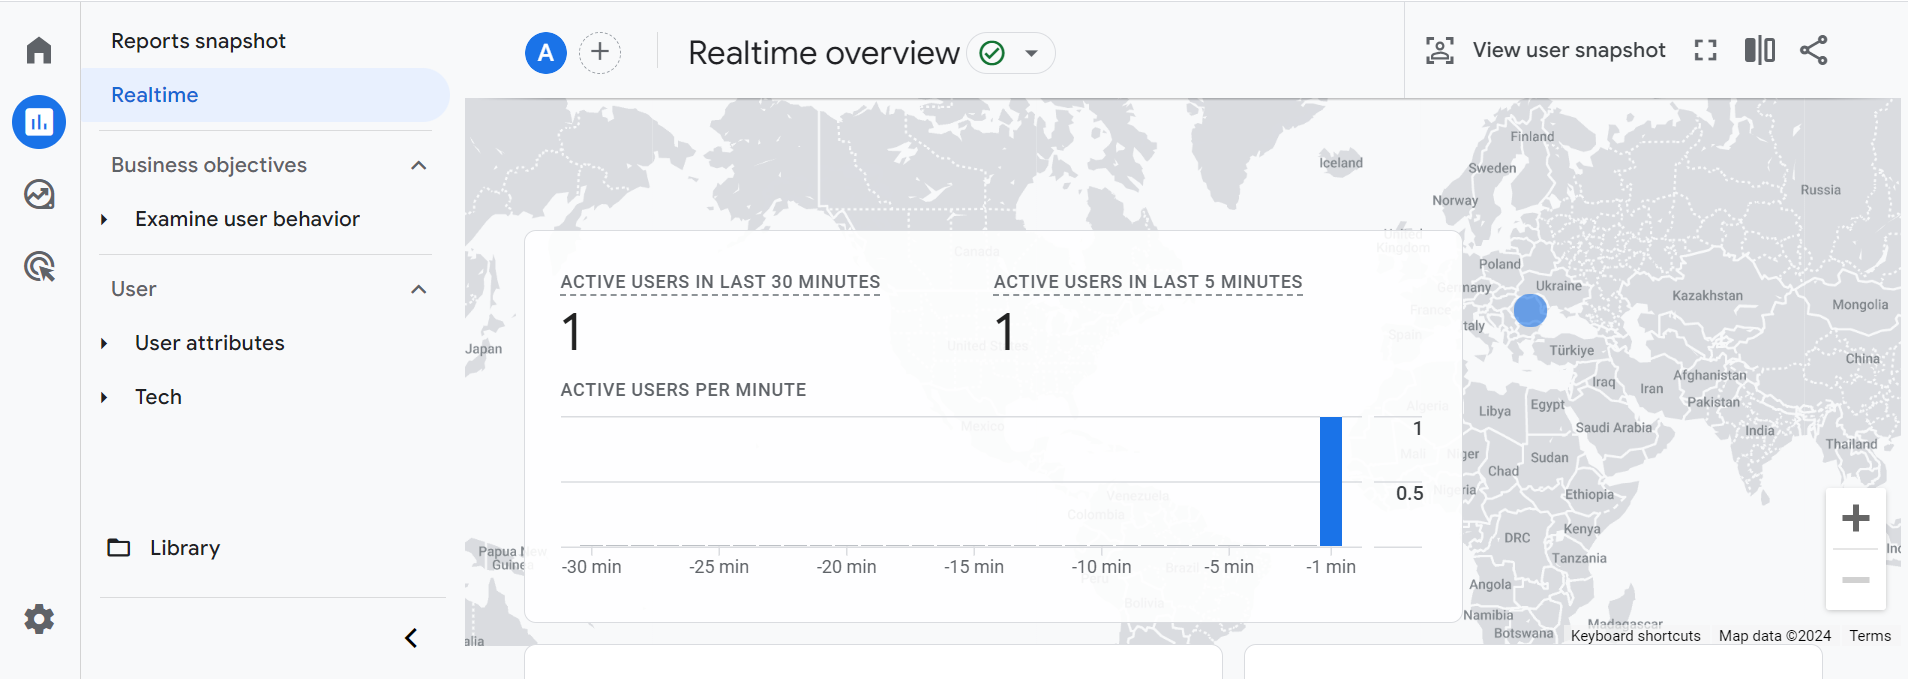
Here, select Google Analytics from the menu, and click Activate to enable the integration. After activation, verify that Google Analytics is receiving data by checking the Realtime reports in your Google Analytics dashboard. Alternatively, you can use Tag Assistant, to ensure that events from the Knowledge Base are successfully integrated into Google Analytics.
Events and Data
Once integrated, Google Analytics will receive events regarding user interactions with Product Fruits content. These events include actions such as opening announcements, completing or skipping tours, and other significant interactions. For the full overview, check out this table.
Installing Google Analytics Into Your Application (Required)
For Google Analytics to function properly, it must be installed in the application where Product Fruits is deployed. This installation enables Google Analytics to capture and analyze user data effectively.
Installing Google Analytics into the Product Fruits Knowledge Base
Although it's not necessary for the basic integration, adding Google Analytics directly to the Product Fruits Knowledge Base can provide additional tracking capabilities.
As it is a single-page application, we need to call the Google Analytics API on page change manually. The standard Google Analytics code snippet cannot be placed in the "<head>" section as required, so we must modify the snippet and handle tracking programmatically.
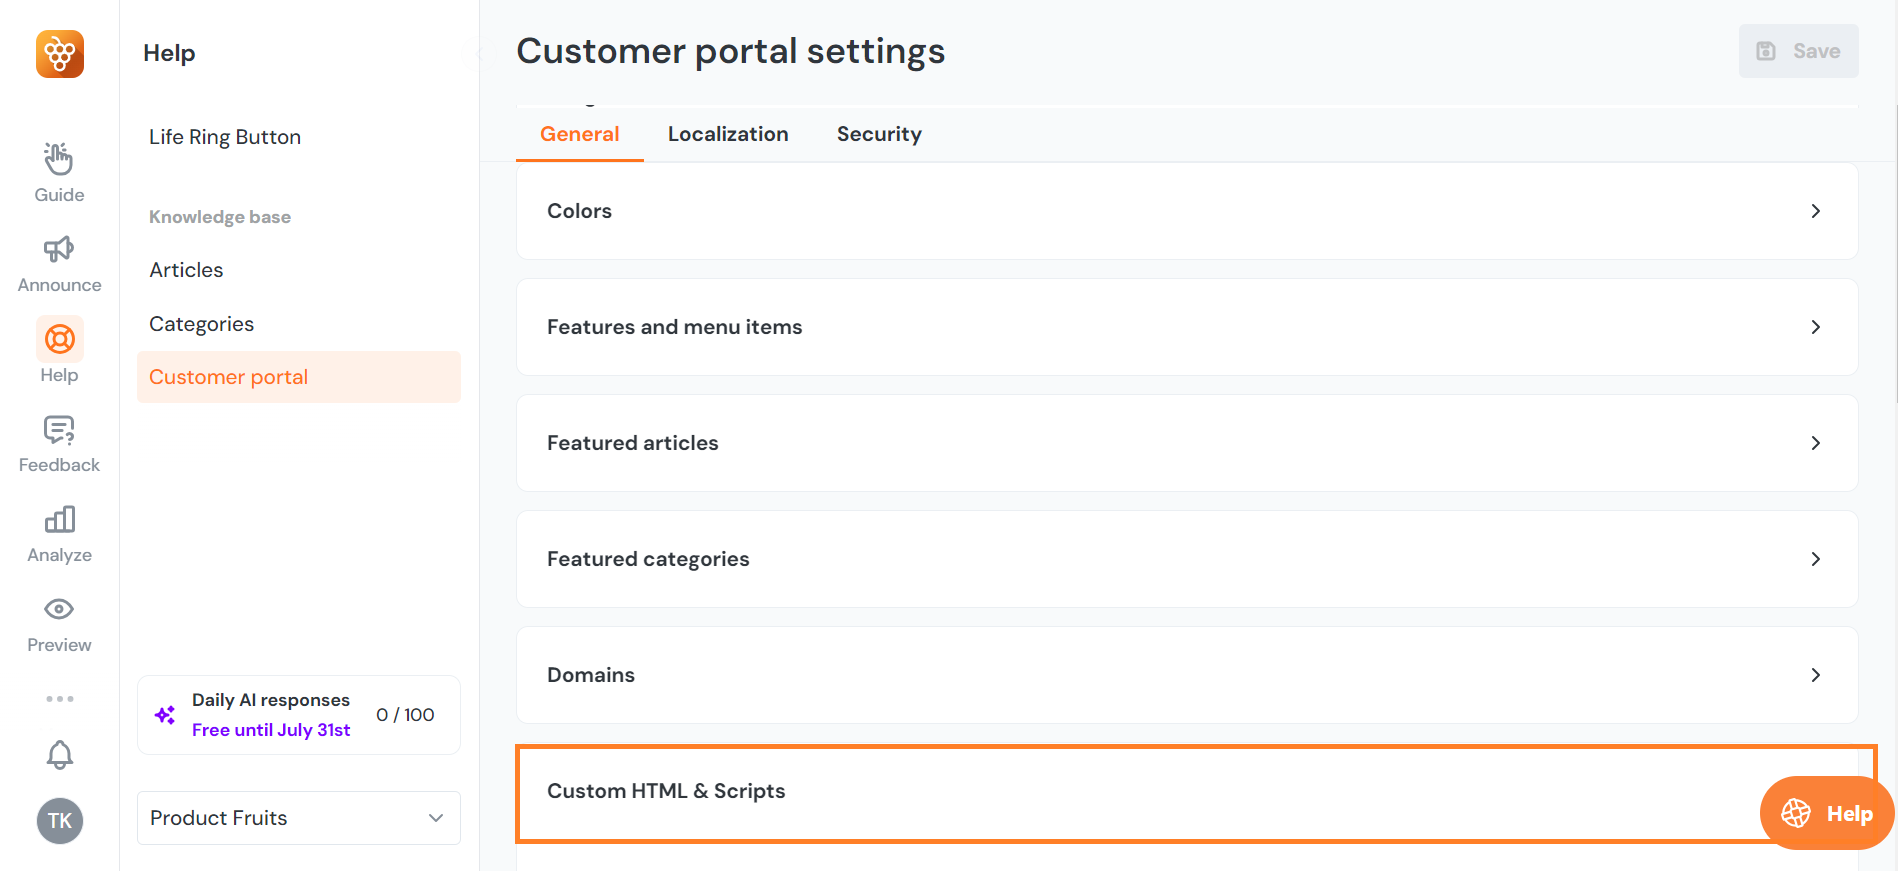
Navigate to Help > Customer portal to access the settings, then under General tab scroll down to the bottom of the page, and open the Custom HTML & Scripts toggle. Here we will work in the Body HTML or script tags box.
To install Google Analytics, use the following JavaScript code snippet. This snippet configures Google Analytics for a single-page application by asynchronously loading the library and initializing it with your tracking ID.
Make sure to replace "YOUR_ID" with your actual G-tag.
<script async src="https://www.googletagmanager.com/gtag/js?id=
YOUR_ID"></script>
<script>
window.dataLayer = window.dataLayer || [];
function gtag(){dataLayer.push(arguments);}
gtag('js', new Date());

function trackPageview(url) {
	gtag('config', 'YOUR_ID', {'page_path': url});
}

window.addEventListener('DOMContentLoaded', function() {
  document.querySelectorAll('a').forEach(function(anchor) {
	anchor.addEventListener('click', function(event) {
		var url = this.getAttribute('href');
		trackPageview(url);
		history.pushState(null, null, url);
	});
  });
});

</script>